Sunday, March 20, 2016


Hi All,
I apologize for not posting in so long.  Life responsibilities...

I do want to share something I discovered years ago that I recently returned to as part of a "construction" theme at a school I currently work at.
Packing peanuts:  But the biodegradable kind. You find them in packages from Amazon, etc.  You can also purchase a big bag of them at Staples.  They are made of a wheat paste and will dissolve if you submerge them in water.  Actually, a cool science experiment.

However, to construct with them, all you need is a dab of water on your finger applied to the end of the packing peanut.  The water acts like glue and they stick to each other to create all kinds of structures; people, towers, animals, vehicles.

If you want to add toothpicks, you don't need the water.  Experiment and see which method you prefer.
Materials


Dab of water


     Using toothpicks


My creations

Have fun!
Eileen


Sunday, January 31, 2016

Years ago, my daughters were avid jugglers.  They made their own juggling balls called "hacky sacks."  More recently, I've discovered these cute little balls can be really helpful in calming an anxious or unregulated child.  I've named them "Squeezy balls" or "Stress balls."
To make them you need: 
-balloons
-rice
-coffee grounds (I let the grounds dry out a day before I use them)

-plastic liter bottle
-funnel


 Place funnel in bottle and spoon rice or coffee grounds into bottom.
 Stretch balloon over the top

 Invert bottle and squeeze until balloon in filled
 Tie securely and squeeze.
Ahh!  I feel more relaxed already.  

 Now try the same procedure using coffee grounds.


I use the Squeezy balls to help settle a wiggly child at circle time meeting or to help calm an anxious or angry child. The rice filled balloons and the coffee filled have a different feel to them.  Some children prefer the smooth, supple quality of the coffee.  Some like the slightly bumpy, harder feel of the rice.  You can also fill balloons with lentils.  Try all and see which you prefer.
These can be made with children.  They love the process!  And then they get to use the fruits of their labor.
Have fun!
- Eileen

Wednesday, January 13, 2016

Hi All,


Today I am excited to show you one of my favorite sensory activities and one that kids are totally drawn to.  It's constructing with foam, wooden golf tees and hammers.  I invented this set-up and I love it because the possibilities are almost endless.


The materials you need are:
- golf tees (about 2 inches or 2 3/4 inch).  These can be purchased at Modell's.


- wooden hammers (found in the dollar store)
- foam (also called "plank.")  Found in delivery boxes of appliances.  I scour the bins in and around my building and have found wonderful, funky shapes.  You can purchase "plank" over the internet, but for me the fun is scavenging.


I start by reading "Bling, Blang" by Pete Seeger.  It can be read or sung and it gets kids in construction mode.


I then have children practice wielding a hammer.  I show them how to hold the hammer, place the golf tee and then bear down on the tee, using the other hand to keep the piece of foam from sliding around.

With all different interesting shapes, kids can make boats, bridges, robots, airplanes, houses, towers, etc....Some kids just enjoy the hammering of many tees into the foam.  Others get excited about the idea of creating stuff.


           And here is my boat.

Have fun!
-Eileen
Sunday, December 20, 2015


Hi All,

Continuing in the series of sensory activities, but taking a break from "flubber-type" concoctions, I'm going to show you how to create mosaics with eggshells.
I am an avid baker and cook, and use a lot of eggs.  Not one to waste materials, I wash out the eggshells, take out the thin membrane attached to the shell wall, let them dry and now have a lovely (free) art material.

To crush eggshells you need:
-clean eggshells
-mortar and pestle (dollar store item)
-black or dark blue heavy paper

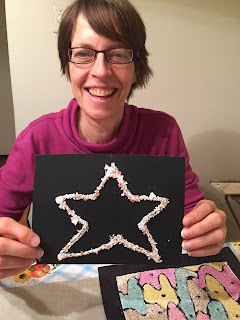
After they are crushed, you can make designs with glue and then sprinkle the eggshells over the design.  Tap excess eggshells and then you have your eggshell design.


Eggshells can be as small as you like. Glue whatever shape you desire.


Shake off the excess shells. 


Note: The colorful picture was achieved by soaking the eggshells in a solution of water, a few drops of food coloring and an ounce of rubbing alcohol (helps with the absorption of color.) For best results, soak overnight, then scoop out the eggshells to dry.  When they are fully dry, they can be used in mosaics.

Have fun!


Wednesday, November 25, 2015

Hi Everyone,

We've been having such a great time this week playing with a funky sensory material called sand slime.  To make it you use white glue and laundry starch (just like flubber.)  But, added to that, is beach sand (you could also use packaged play sand from Lowe's, Home Depot, etc.)


The beauty of sand slime is that it holds together like play dough but has the elasticity of flubber/ silly putty.

To make sand slime you need:

-One cup sand
-1/2 cup white glue
-laundry starch (pour a little at a time, while mixing with your hands until it holds together in a ball 
and is not sticky.)

         
Ingredients 


You will have to knead it and work it around with your hands, until you have the desired consistency. It should feel like a sandy version of play dough.


Decorating with real beach shells.


Scissors make a nice clean cut.


                            We like to use sticks to build with.


It stretches, but is also quite strong.  Look at the tent we made!


Bottle caps make great "cookies."


Have fun!  In my next post, I will show you how to use eggshells in a sensory activity as well as an art project.

Happy Thanksgiving!

-Eileen


Sunday, November 15, 2015

For my next few posts, we will demonstrate how to make and use sensory materials which are alternatives to play dough.  Don't get me wrong.  Homemade play dough is fantastic and I will provide recipes for a few of my favorites.  But, we will start with a crazy, squishy substance called "Flubber."

To make flubber you need:
-  1 cup Elmer's school glue
- 1/2 cup Linit laundry starch (found in detergent section of supermarket)
-food coloring (optional)
-bowl

*These measurements are approximate.  You have to play around with the proportions until you reach the desired texture.

  Ingredients


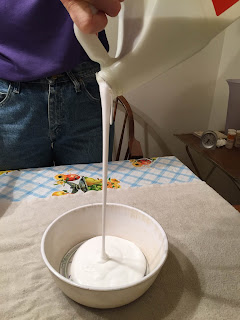
    Pour glue into bowl


  Add some laundry starch


    Mix around with your hands


It will be gooey, slimy, stretchy and sticky


               Keep molding it until consistency is a ball that holds together well.  If it feels too            sticky, add a little laundry starch.  If it feels too stringy, add a little glue.


 We like to hide spiders and try to find them!


Poking around for the little devils


  Got  it!


       Now we'll hide beads.  Looks like a cookie!


And of course, we like to stretch it


and cut it


  It becomes translucent when you stretch it out
 Have fun!

-Eileen